

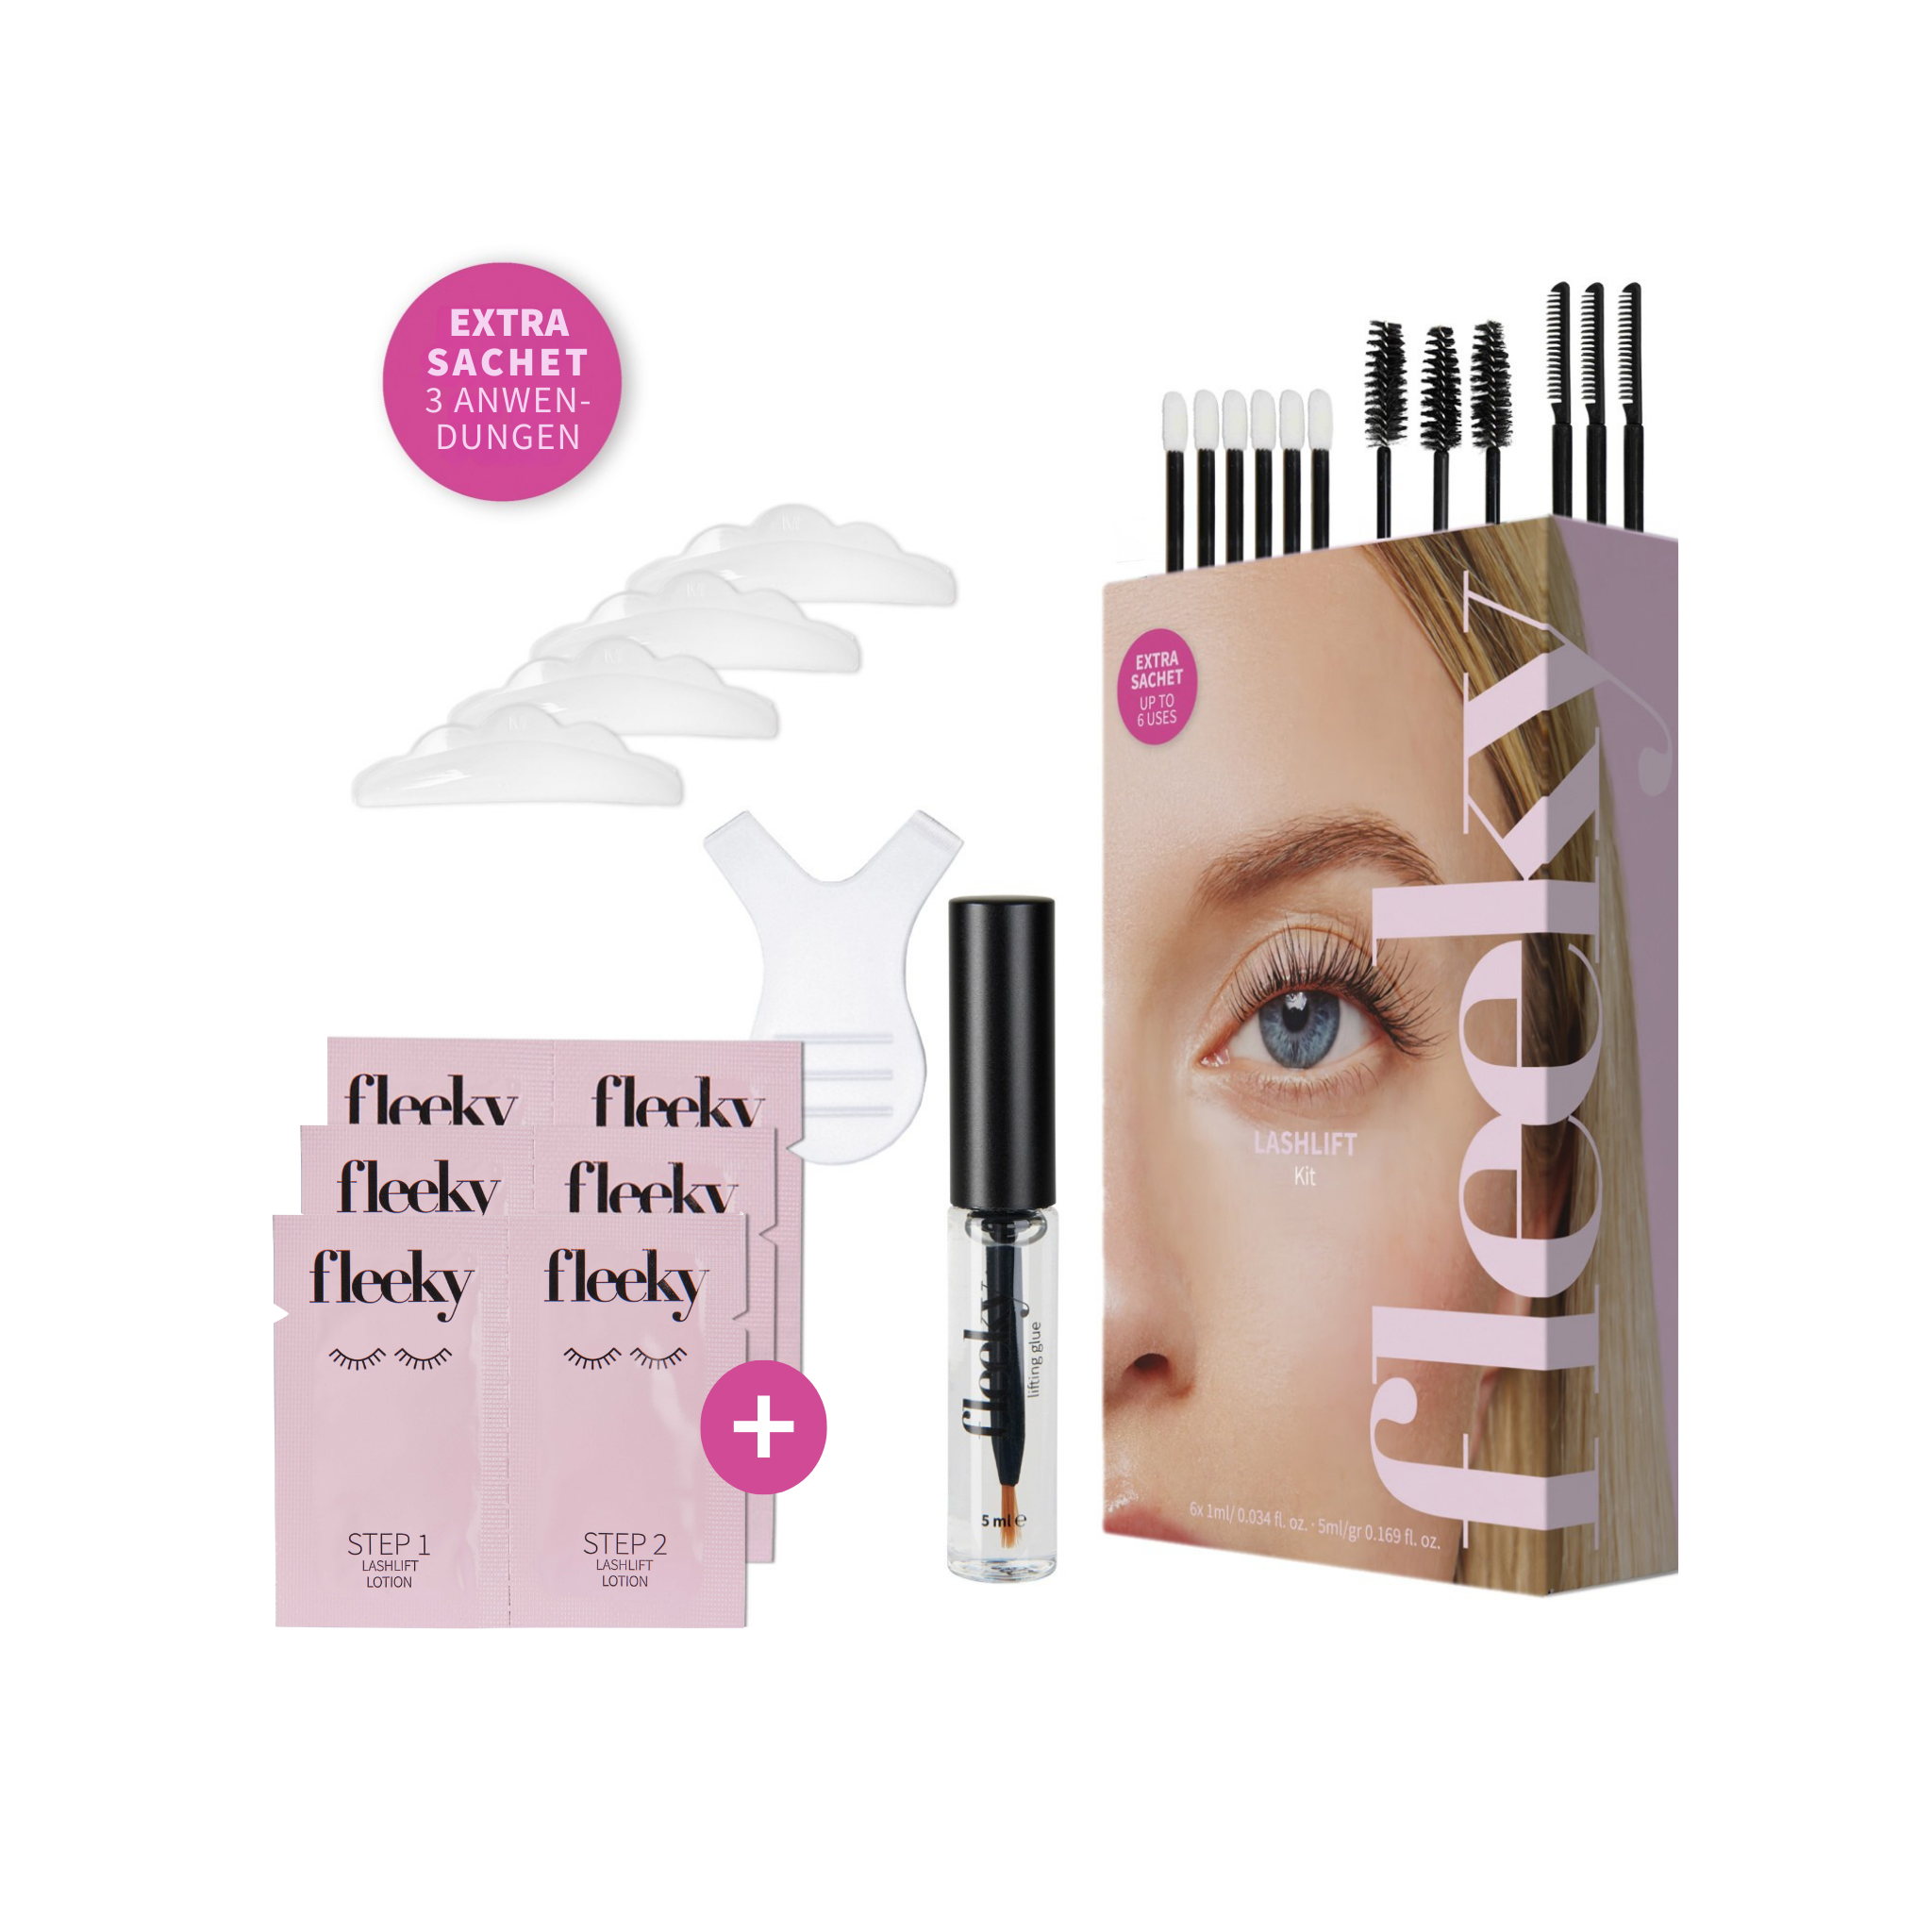


Lashlift Kit
For fuller, naturally lifted lashes
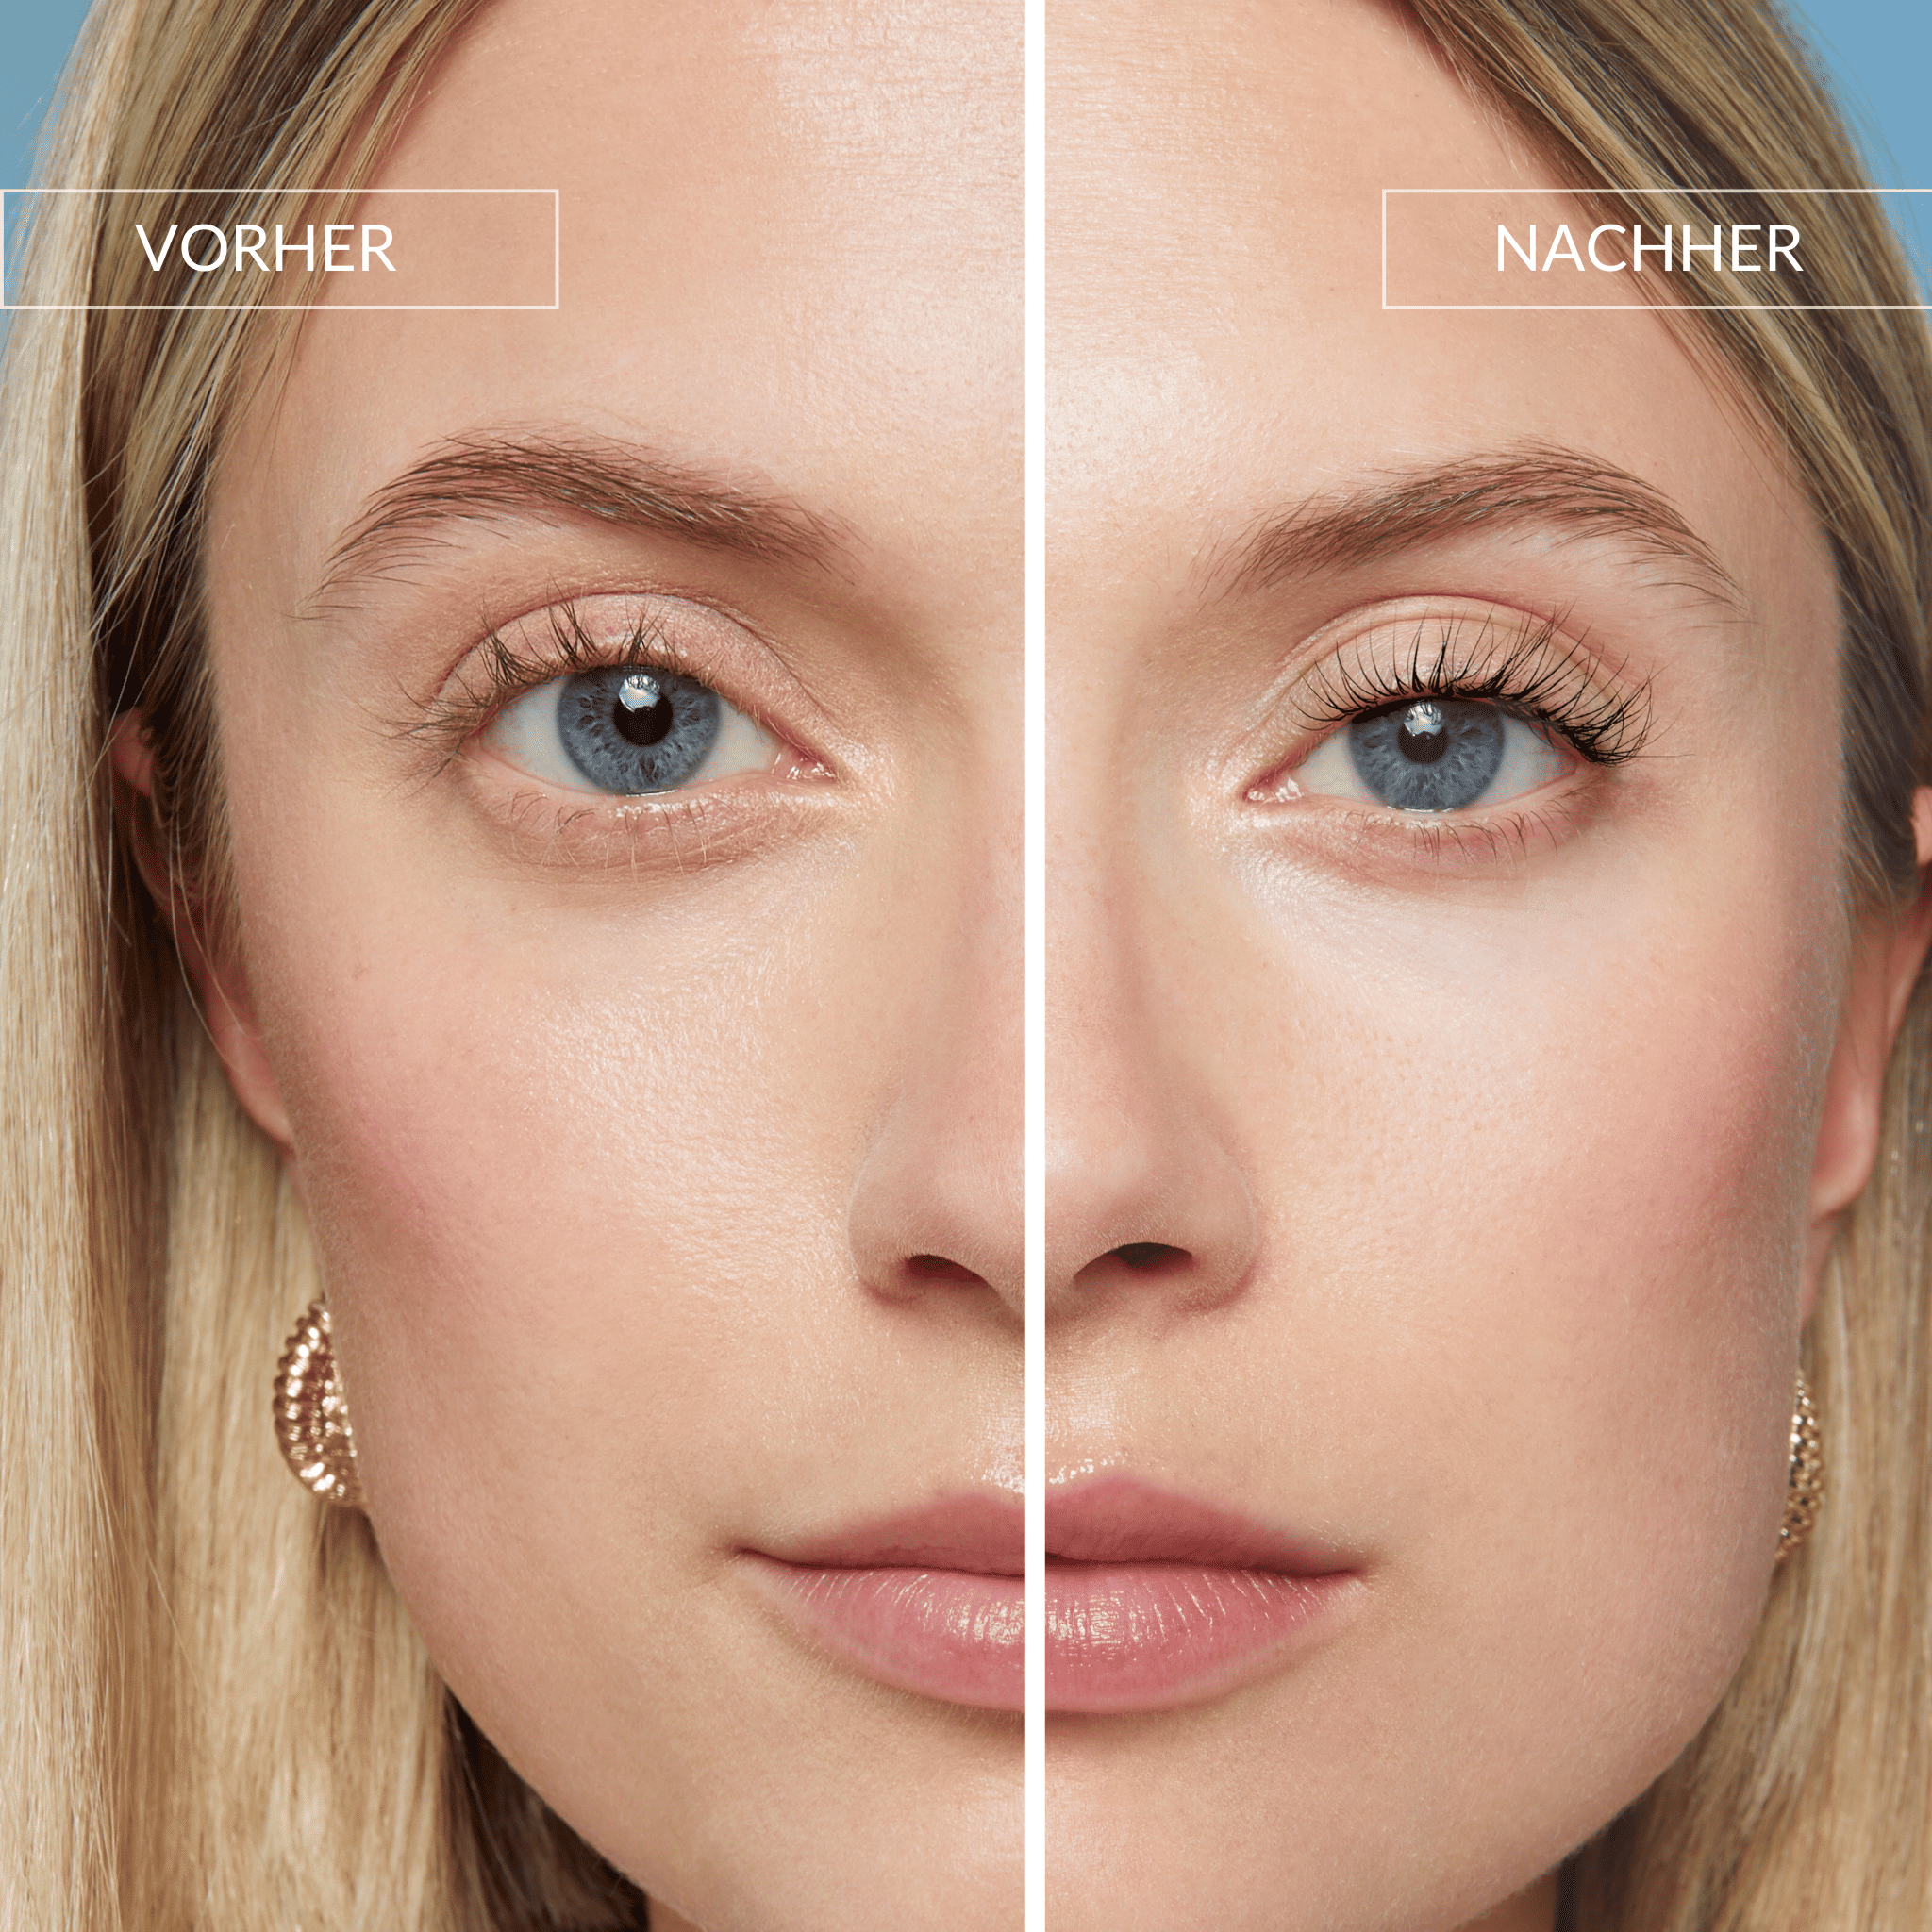
Lifted and visibly fuller lashes for 6 weeks
Professional results for beginners
Suitable for all lash types
Vegan & not tested on animals
Only €11,99 for each Lift vs. €70+ in the studio!
More info
What you get
Shipping & Returns
With you in 2–3 business days!
Shipping: 9.99€ (free from 60€)
Returns: Free returns within 30 days.
Lashlift Kit
Sale price€35,99
Regular price€39,99
Choose options
Lashlift Kit
Sale price€35,99
Regular price€39,99
Brighter eyes and curled lashes
Naturally lifted look
Lashlift Kit IRL
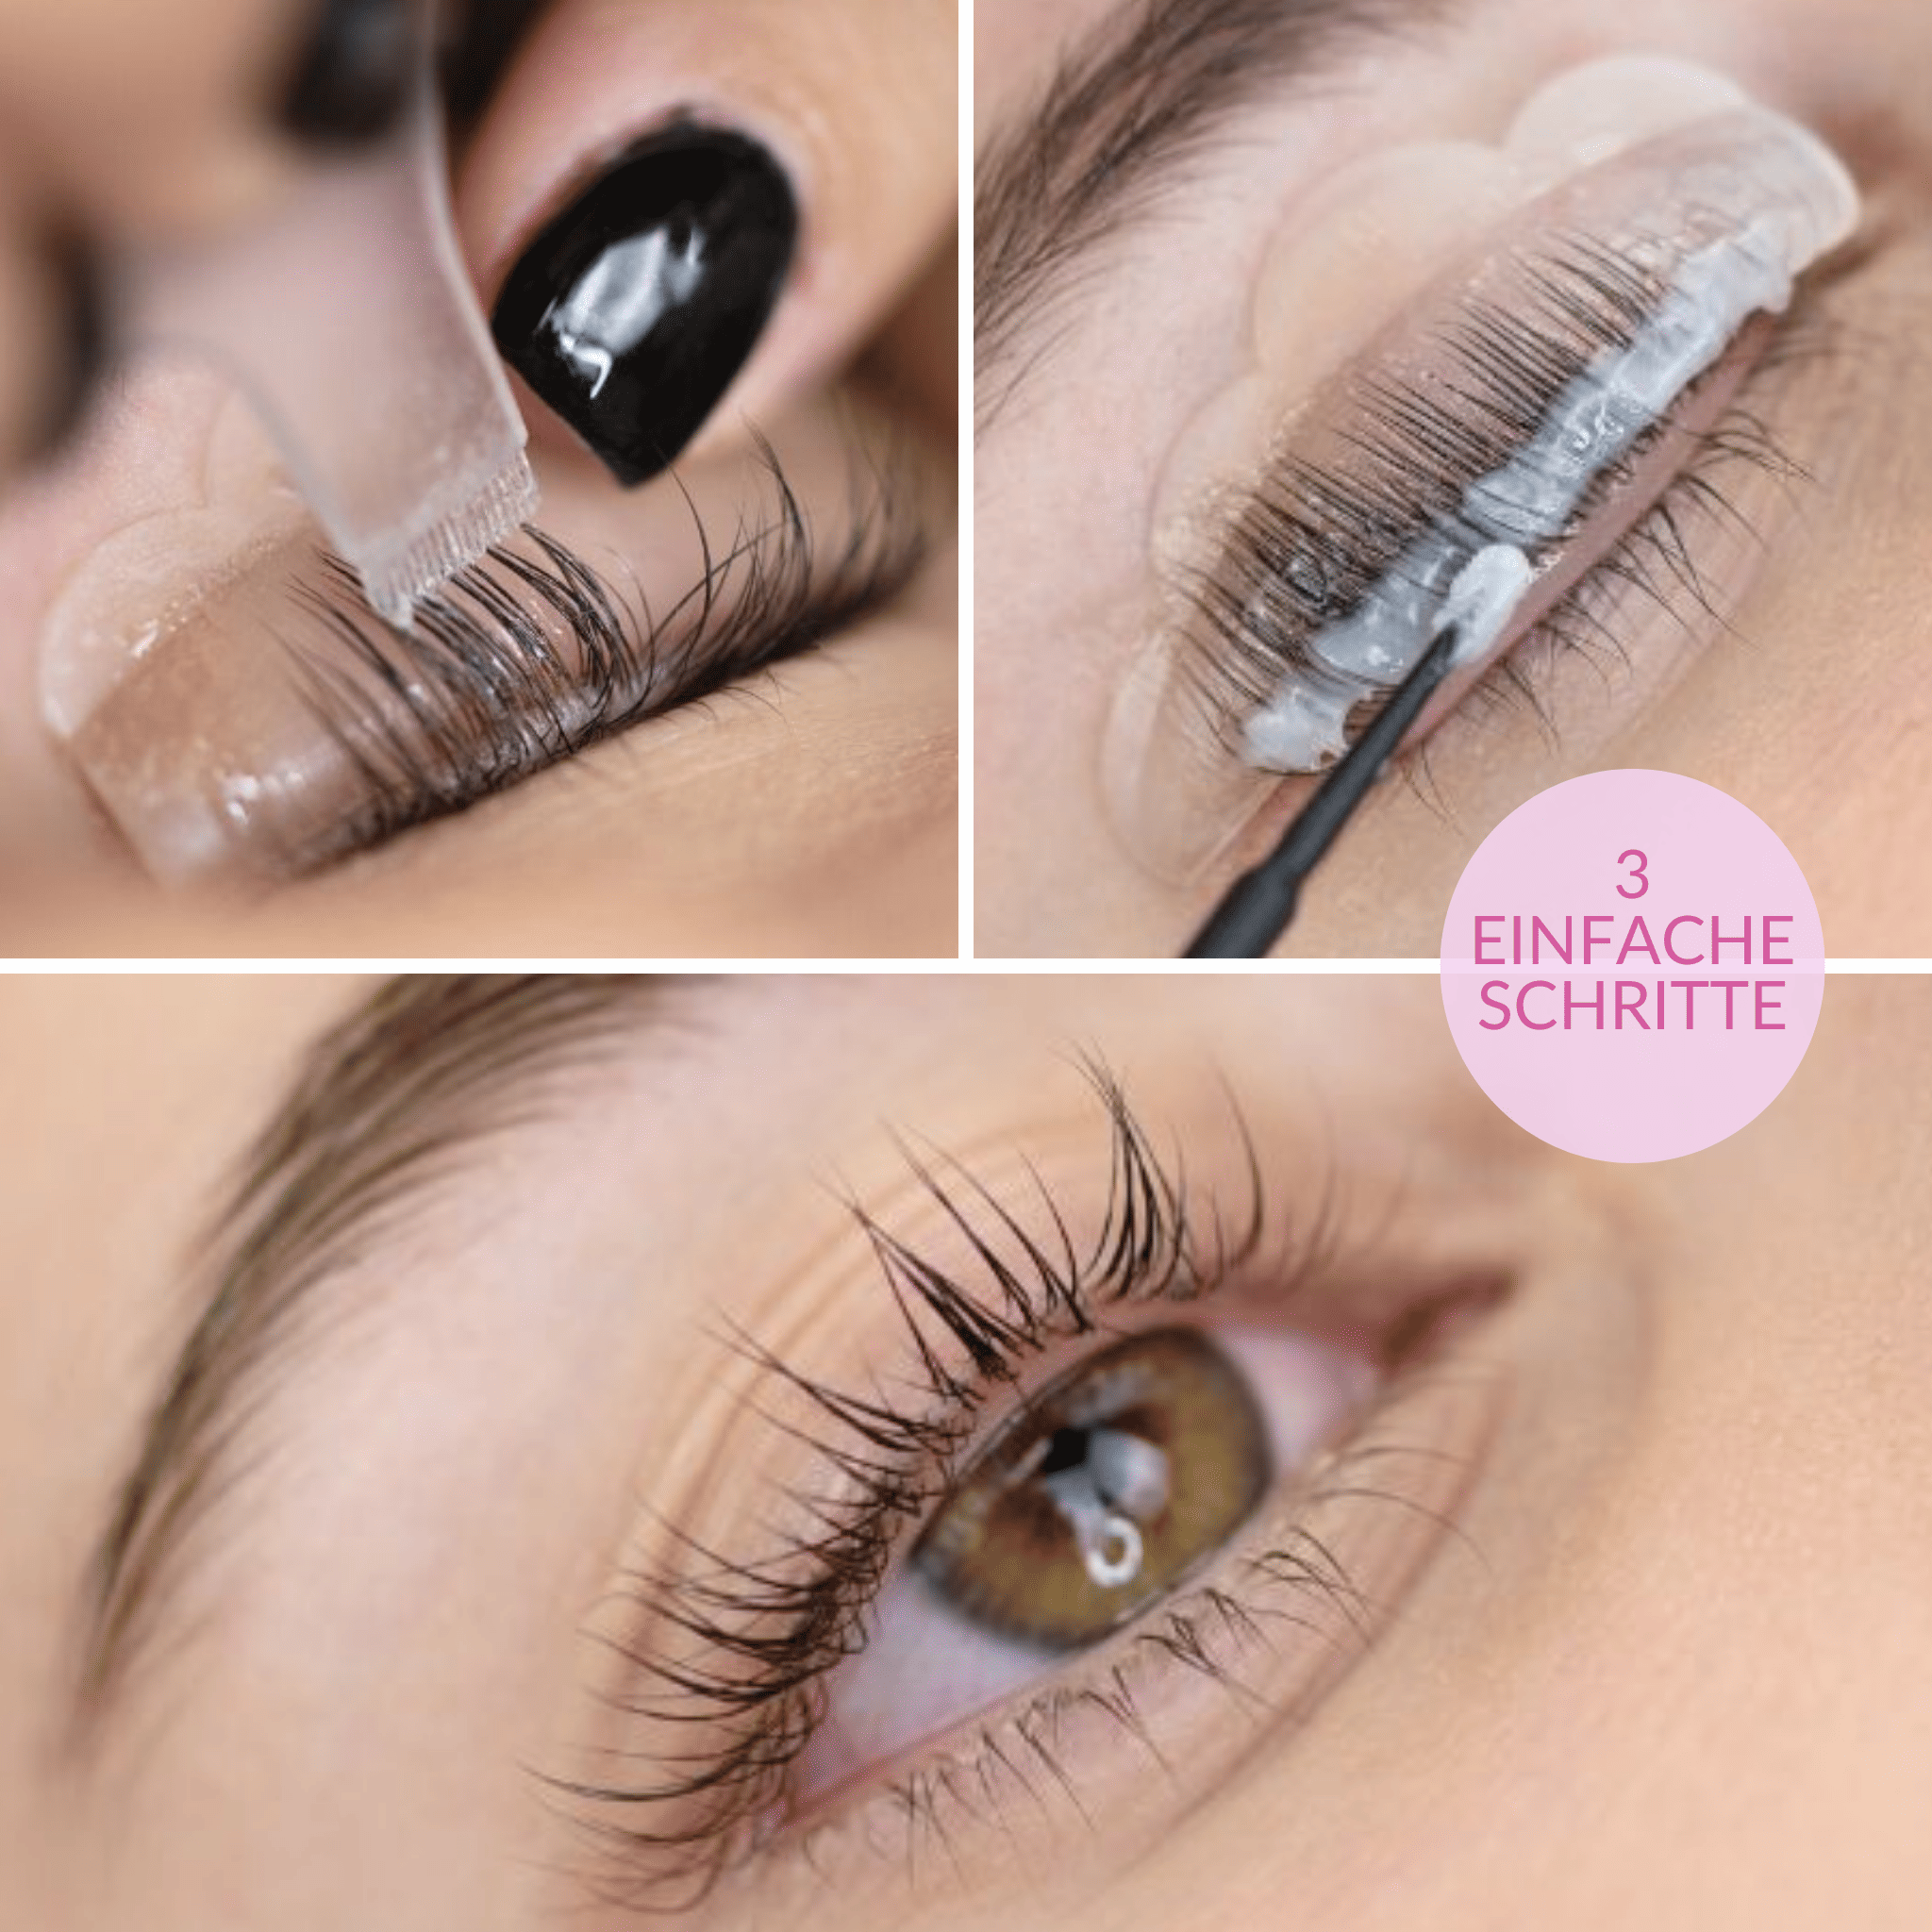
Laslift How-to
Step 1: Cleanse
Step 2: Attach silicone pads
Step 3: Fix it! Fix eyelashes
Step 4: Power To The Lashes! With Step 1 Lashlift Lotion
Step 5: Lift it up! With Step 2 Lashlift Lotion

Step 6: Finish
Step 1: Cleanse
Step 2: Attach silicone pads
Step 3: Fix it! Fix eyelashes
Step 4: Power To The Lashes! With Step 1 Lashlift Lotion
Step 5: Lift it up! With Step 2 Lashlift Lotion
Step 6: Finish